STEP2Create a floor plan
Before you start
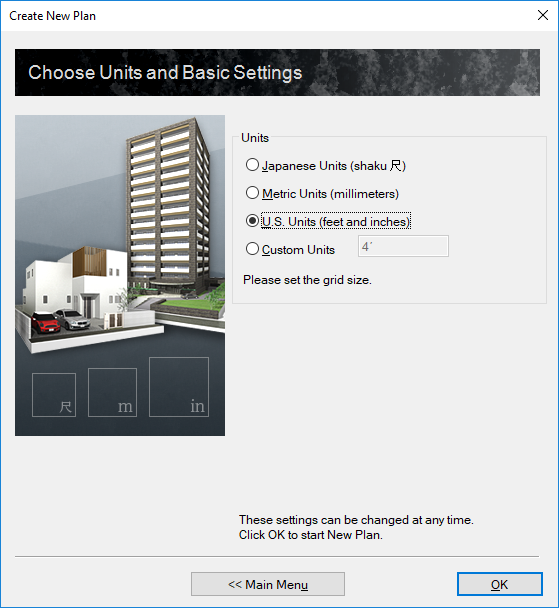
Unit of Measurement Setting
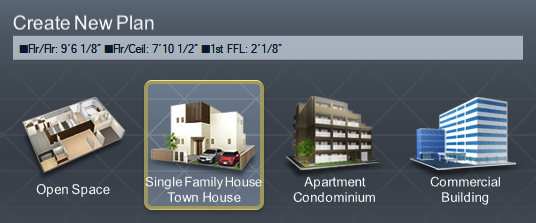
When you start work with a new plan, select a plan type from [Create New Plan] listed below, and set unit of measurement.
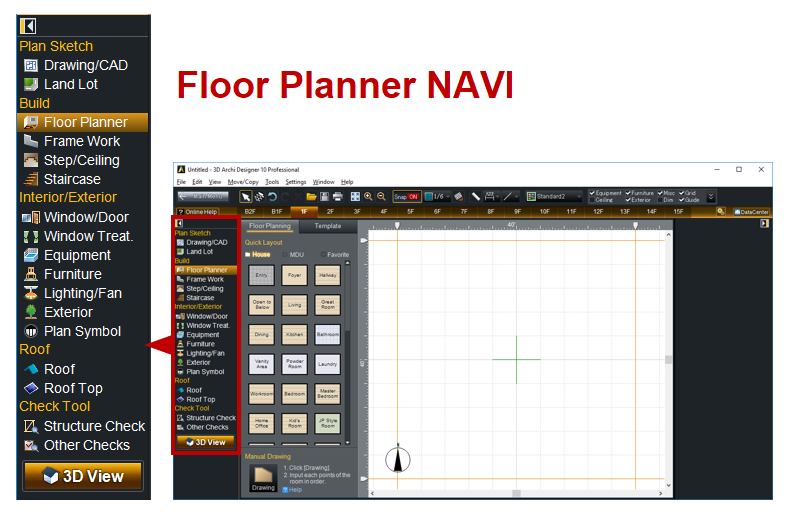
Floor Planner
After setting unit of measurement, it brings you to "Floor Planner".
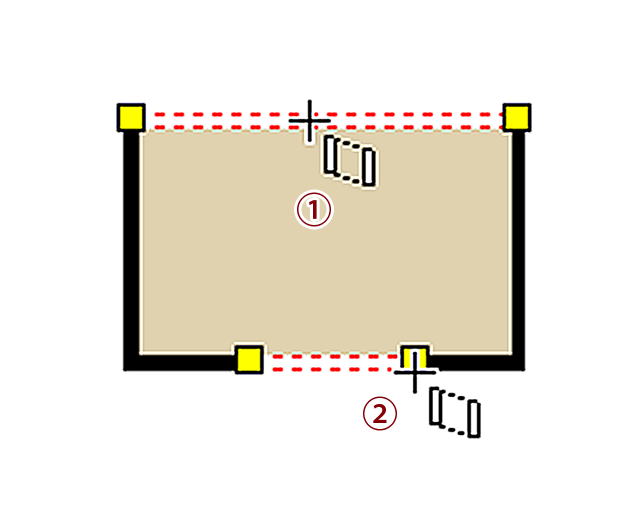
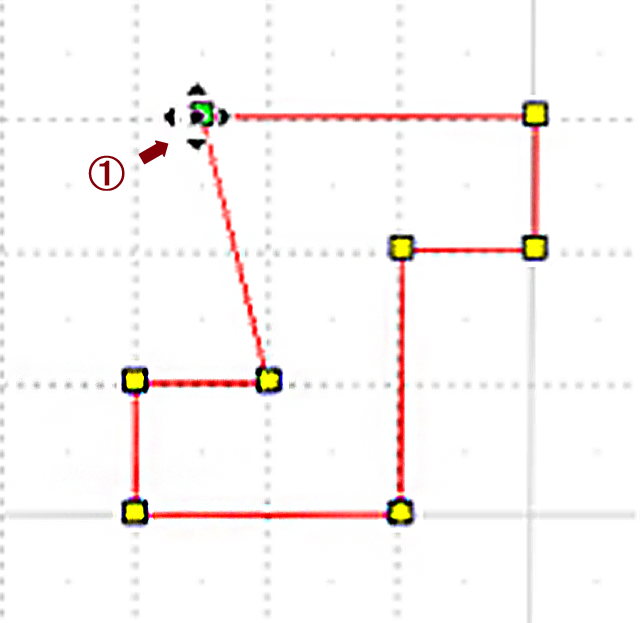
Guiding Line
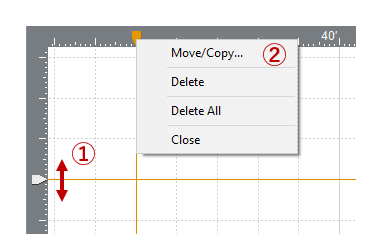
①To move a guiding line to where you want, click a tab and drag. ②To delete or copy a guiding line, right click the tab.
Guiding Line
- To move a guiding line to where you want, click a tab and drag.
- To delete or copy a guiding line, right click the tab.
Draw a Land Lot
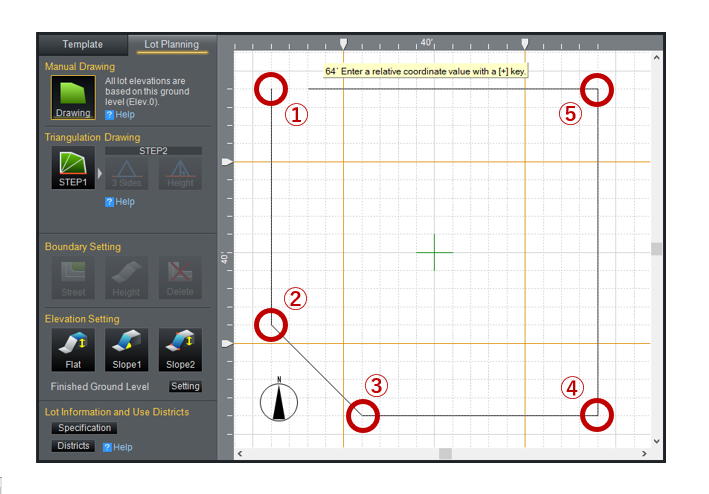
Click [Drawing] at "Lot Planning" and draw a land lot with your cursor by placing the vertex.
To end, go back to the starting point or right-click.
Draw a Land Lot

Resize and Move
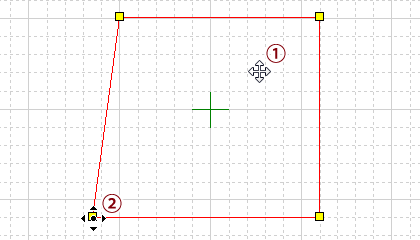
To resize, drag the vertex to how you want.
To move, click the land lot and drag to where you want.
Resize and Move
- To resize, drag the vertex to how you want.
- To move, click the land lot and drag to where you want.
Place a room
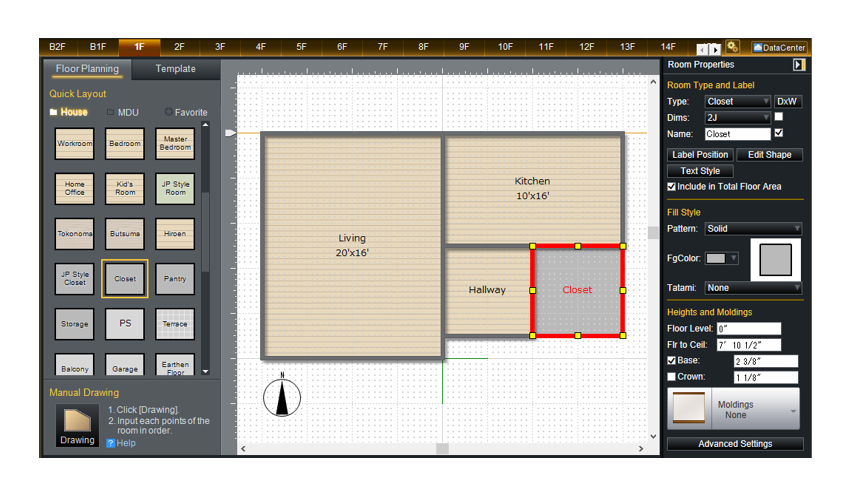
Click "Floor Planner".
Select a room from "Quick Layout", and place where you want.
- Do not make rooms overlapped.
Place a Room
Edit a Wall
Click "Frame Work".
Select a button from "Opening and Height" or "Wall Thickness", and drag to a wall you want to edit.
To apply to a whole wall, click on the wall. To apply partially, drag a part of the wall.


Edit a Wall

- Click "Frame Work". Select a button from "Opening and Height" or "Wall Thickness", and drag to a wall you want to edit.
- To apply to a whole wall, click on the wall. To apply partially, drag a part of the wall.
Create a Curved Wall

Click [Curve].
Click a wall you want, and Curved Wall Design dialog box is shown.
Enter a value, and select a direction.

Create a Curved Wall
Place a Staircase
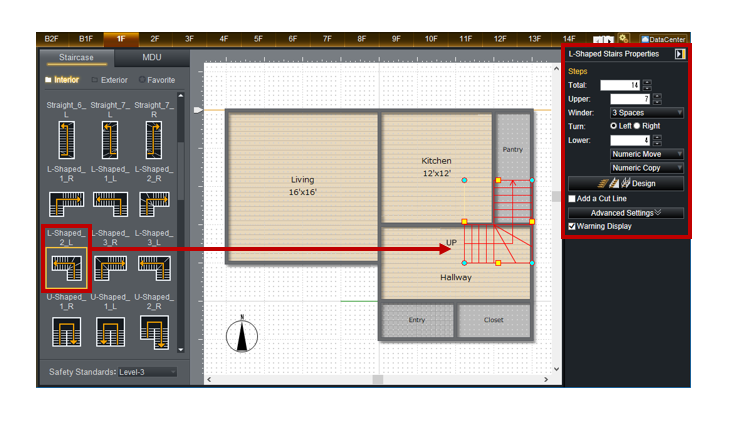
Click "Staircase". Select a staircase and place on a room.
Place a Staircase
Reposition a Staircase
You can rotate, move and resize a staircase.
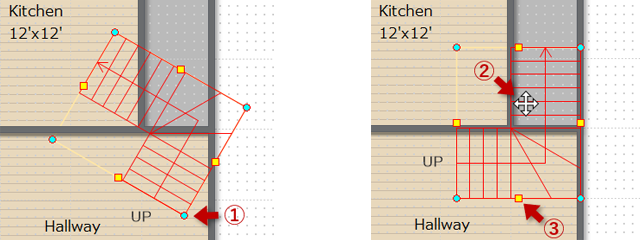
- Rotate a staircase by turning the light blue handle.
- Move a staircase to where you want by dragging.
- Resize a staircase by adjusting the position of yellow squares.
Create a Second Floor
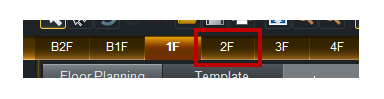
【1】Click "2F" tab.
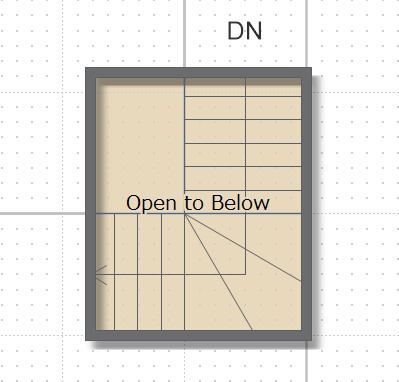
【2】Open Below is automatically placed above the staircase.
Create a Second Floor
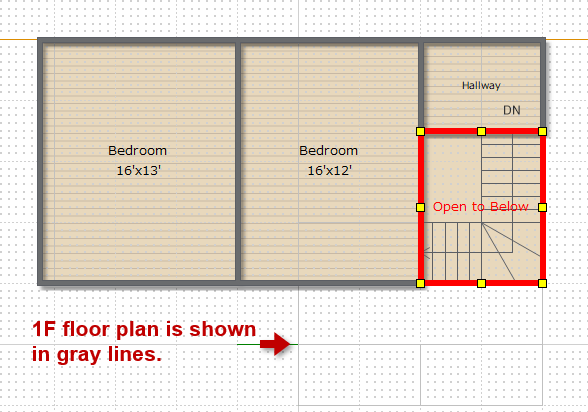
【3】Click "Floor Planner" and continue to create the 2F floor plan.
Create a Second Floor
1F floor plan is shown in gray lines
Place a Window / Door
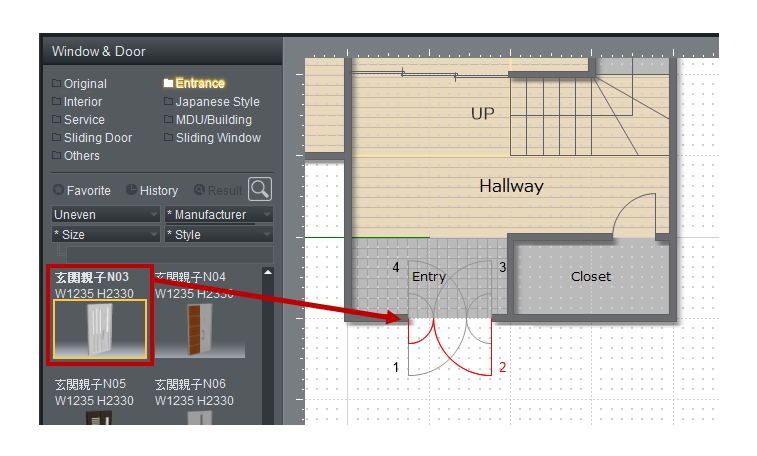
Click "Window/Door". Select a door and place on a wall. Indicate the opening direction with your cursor.
A window can be placed with the same procedure.
Place a Window / Door
Place Equipment and Furniture
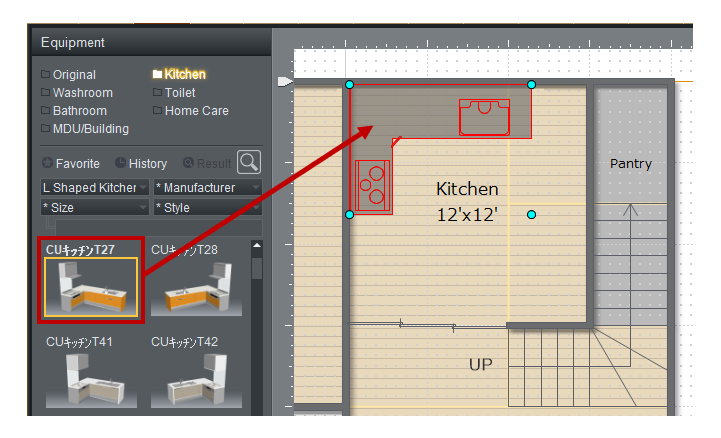
Click "Equipment".
Select a equipment and place on the plan.
You can place "Furniture" and "Lighting/Fan" with the same procedure.
Snap on
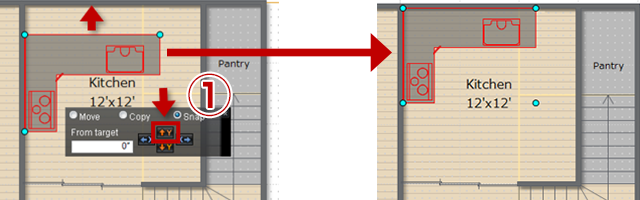
- Click a direction.
Design Exterior
Click "Exterior".
Place Wall, Fence, Walkway or Ramp.
- Textures can be selected in 3D View.
-
Wall and Fence
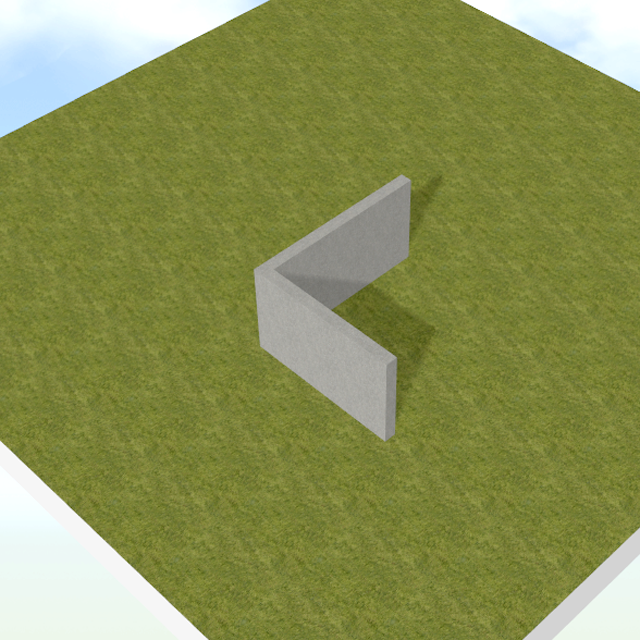
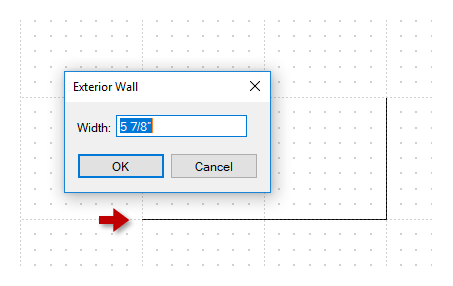
Click [Wall] and position a starting point with your cursor and end with double-click. Enter the value of thickness and indicate the direction.
Wall and Fence
-
Walkway
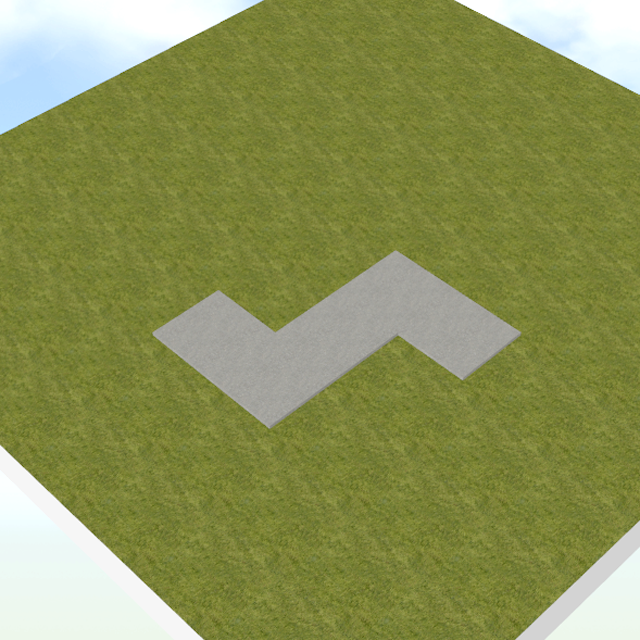
Click [Walkway] and place on the plan.
Change the shape by adjusting the position of yellow squares.
You can also draw a walkway from [Drawing].Walkway
-
Ramp
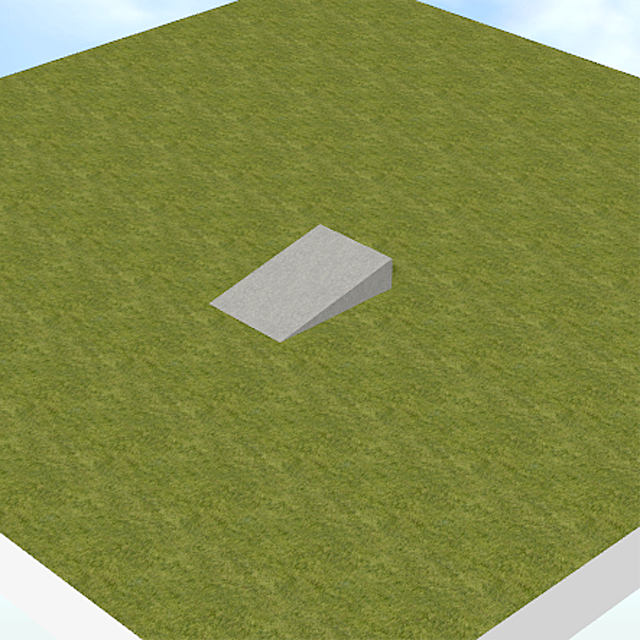
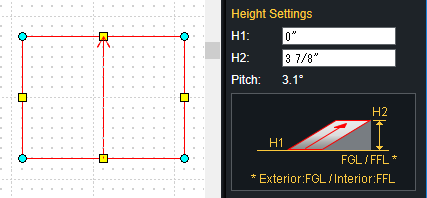
Click [Ramp] and place a point on the plan. Then, drag to the diagonal and click to end.
Ramp
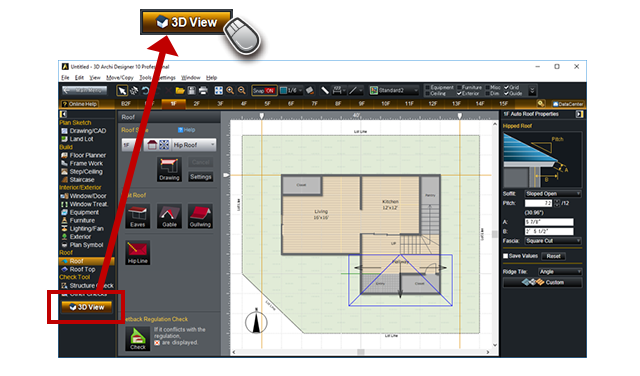
Create a Roof
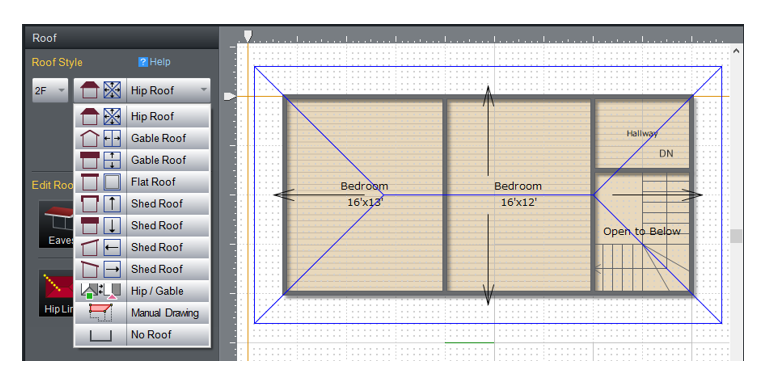
Click "Exterior".
Select a floor and a "Roof Style".
You can set the details of Sofit, Pitch, Fascia in the "Roof Properties".
Let's check your floor plan and work with design and details.
Click [3D View] to see 3D images.